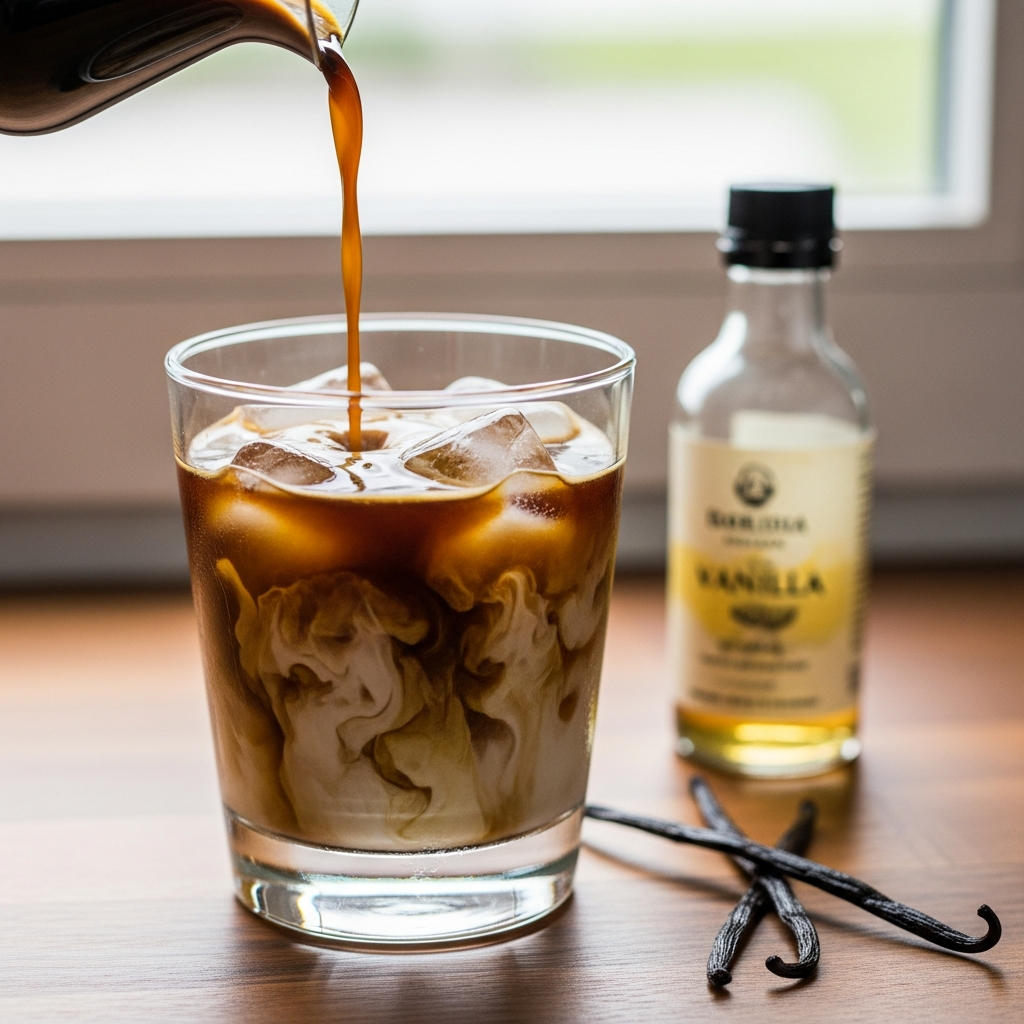
The iced vanilla latte is my most-ordered coffee shop drink by a wide margin. I probably bought three of them a week for the better part of two years before I finally sat down and figured out how to make one at home that tasted right. Not close. Not “pretty good for homemade.” Actually right.
It took some experimenting, but I eventually landed on three versions that I rotate between depending on my mood and what I have in the fridge. The Starbucks copycat version is the indulgent one — it matches the real thing almost exactly. The healthy version cuts the sugar in half without tasting like a compromise. And the dairy-free version uses coconut milk and vanilla bean paste in a way that I honestly might like better than the original.
I am going to walk you through all three, including the exact proportions I use, a calorie comparison, and a quick recipe for homemade vanilla syrup that blows store-bought away.
What Makes a Great Iced Vanilla Latte
An iced vanilla latte is espresso, milk, vanilla syrup, and ice. That is it. Four ingredients. But the ratio between those ingredients is everything. Too much milk and it tastes like vanilla milk with a hint of coffee. Too little vanilla and you just have an iced latte. Too much syrup and it is cloying.
The Starbucks grande iced vanilla latte uses 2 shots of espresso, 3 pumps of vanilla syrup (about 1.5 tablespoons), 2% milk, and ice. That is the starting point I worked from. Each version below adjusts those ratios for a different goal.
One thing before we start: you do not need an espresso machine. Strong coffee works. A Moka pot works. A Keurig on the small cup setting works. You need concentrated coffee — about 2-3 oz worth — not specifically espresso.
How to Make Homemade Vanilla Syrup (5 Minutes)
Before the recipes, let me give you the vanilla syrup recipe. This is optional — you can buy Torani or Monin vanilla syrup and it works fine. But homemade is better and cheaper if you make iced lattes regularly.
Ingredients:
- 1 cup granulated sugar
- 1 cup water
- 1 vanilla bean, split lengthwise (or 2 teaspoons pure vanilla extract)
Instructions:
- Combine sugar and water in a small saucepan over medium heat.
- Stir until the sugar fully dissolves — about 2-3 minutes. Do not let it boil.
- Remove from heat. If using a vanilla bean, scrape the seeds into the syrup and drop the pod in too. If using extract, just stir it in now.
- Let it cool completely, then transfer to a jar or squeeze bottle.
- Store in the fridge. It lasts 2-3 weeks. If you used a vanilla bean, leave the pod in the jar — the flavor keeps developing.
This makes about 1.5 cups of syrup, which is enough for roughly 15-20 iced lattes. The cost works out to about $0.15 per drink if you use extract, or $0.40 if you splurge on a vanilla bean.
Version 1: Starbucks Copycat Iced Vanilla Latte
This is the version that matches what you would get at a Starbucks drive-through. I did a side-by-side taste test with my wife (she did not know which was which), and she picked the homemade one as “more vanilla-y” but otherwise could not tell the difference. I will take that as a win.
Ingredients
- 2 shots espresso (about 2 oz) or 3 oz very strong brewed coffee
- 2 tablespoons vanilla syrup (homemade or store-bought)
- 1 cup 2% milk
- Ice to fill a 16 oz glass
Equipment
- Espresso machine, Moka pot, AeroPress, or Keurig
- 16 oz glass
Step-by-Step Instructions
- Pull your espresso shots. If you are using a Moka pot, brew a full 3-cup pot and measure out 2-3 oz. If you are using a Keurig, brew the smallest cup size (6 oz) and use 3 oz of it. Let the coffee cool for a minute — you do not want it to melt all the ice instantly.
- Add vanilla syrup to the espresso. Stir it in while the coffee is still warm. This is important — warm liquid dissolves the syrup completely. If you add syrup to cold milk, it tends to settle at the bottom.
- Fill your glass to the top with ice. Use large ice cubes if you have them — they melt slower and keep the drink from getting watery.
- Pour the vanilla espresso over the ice. You will hear it crackle.
- Add milk. Pour the 2% milk over the top. The coffee and milk will layer beautifully — stir it or leave it for the Instagram moment, your call.
Nutrition (Approximate)
Calories: 190 | Sugar: 28g | Protein: 8g | Fat: 5g
Most of those calories come from the vanilla syrup. The espresso and milk contribute relatively little.
Pro Tips
- Starbucks uses 2% milk by default, but whole milk makes a noticeably creamier drink. It adds about 30 extra calories.
- If you want the exact Starbucks experience, use Starbucks-brand vanilla syrup. It is available at most grocery stores in the coffee aisle.
- For a stronger coffee flavor, use 3 shots instead of 2. The extra shot cuts through the sweetness.
Version 2: Healthy Iced Vanilla Latte
This version has roughly half the sugar and fewer calories while still tasting like an iced vanilla latte. I drink this one on weekdays when I want something that feels like a treat but does not derail the day nutritionally.
Ingredients
- 2 shots espresso (about 2 oz) or 3 oz strong brewed coffee
- 1 tablespoon sugar-free vanilla syrup (Jordans Skinny Syrups and Torani both make good ones)
- 1 cup oat milk (I use Oatly Barista Edition — it has the best texture for lattes)
- Ice to fill a 16 oz glass
- Optional: pinch of cinnamon on top
Step-by-Step Instructions
- Brew your espresso or strong coffee. Same as Version 1.
- Add sugar-free vanilla syrup to the hot espresso. Stir to combine.
- Fill a glass with ice.
- Pour the vanilla espresso over the ice.
- Add oat milk and stir. The oat milk gives it a naturally sweet, creamy quality that compensates for the reduced sugar. If you want a little extra sweetness, add 1 teaspoon of honey or a few drops of liquid stevia.
Nutrition (Approximate)
Calories: 90 | Sugar: 7g | Protein: 3g | Fat: 3g
That is exactly 100 fewer calories than the copycat version. Over a summer of daily lattes, that adds up to about 9,000 fewer calories. Just saying.
Pro Tips
- Oat milk is naturally sweeter than regular milk, which is why it works so well here. Almond milk is lower calorie but thinner and less satisfying.
- If you do not like sugar-free syrups, use 1 tablespoon of regular vanilla syrup instead of 2. You get half the sugar of the copycat with real sweetener.
- The cinnamon is not just for looks — it adds warmth and complexity that masks the slight aftertaste some people notice in sugar-free syrups.
Version 3: Dairy-Free Iced Vanilla Latte
This version is completely dairy-free and uses coconut milk with vanilla bean paste instead of syrup. Honestly, this might be my favorite of the three. The coconut milk adds a subtle tropical richness and the vanilla bean paste gives it these gorgeous little vanilla specks and a deeper flavor than extract alone.
Ingredients
- 2 shots espresso (about 2 oz) or 3 oz strong brewed coffee
- 1 teaspoon vanilla bean paste (Nielsen-Massey is excellent)
- 1 tablespoon maple syrup
- 1 cup full-fat coconut milk (from a carton, not a can — canned coconut milk is too thick)
- Ice to fill a 16 oz glass
Step-by-Step Instructions
- Brew your espresso. Same method as above.
- While the espresso is hot, stir in the vanilla bean paste and maple syrup. The heat helps the maple syrup dissolve and bloom the vanilla. You will notice the aroma immediately.
- Fill a glass with ice.
- Pour the vanilla-maple espresso over the ice.
- Add coconut milk. Pour it slowly — it creates a beautiful white layer against the dark coffee. Stir when ready to drink.
Nutrition (Approximate)
Calories: 110 | Sugar: 14g | Protein: 1g | Fat: 5g
Pro Tips
- Vanilla bean paste is worth the splurge for this recipe. A jar costs about $12 and lasts months since you only use a teaspoon at a time. The visual effect and depth of flavor are noticeably better than extract.
- Maple syrup pairs better with coconut milk than white sugar does. The flavors complement each other in a way that tastes intentional, not like substitutions.
- If you want it sweeter, go up to 2 tablespoons of maple syrup. But taste it first — between the coconut milk and vanilla, it might already be sweet enough.
Side-by-Side Comparison of All Three Versions
Here is how the three versions stack up against each other:
Taste: The copycat is the sweetest and most familiar. The healthy version is lighter and more coffee-forward. The dairy-free version has the most interesting flavor — the coconut and maple add dimension that the others lack.
Calories: Copycat: 190 | Healthy: 90 | Dairy-Free: 110
Cost per drink: Copycat: $0.85 | Healthy: $0.95 | Dairy-Free: $1.10 (coconut milk and vanilla bean paste are pricier)
Time to make: All three take about 3-4 minutes. The only variable is your espresso method.
Best for: Copycat — when you want the Starbucks experience without leaving home. Healthy — daily drinkers watching sugar. Dairy-free — anyone avoiding dairy, or anyone who wants to try something genuinely different.
How to Make Iced Vanilla Lattes in Batch
If you drink iced vanilla lattes every day (I certainly do in summer), batch-prepping saves a ton of time. Here is my Sunday evening routine:
- Make a large batch of cold brew concentrate (1 cup grounds to 4 cups water, steep 16 hours). This gives me concentrated coffee for the whole week.
- Make a jar of vanilla syrup (the recipe above).
- Pre-portion the coffee: I pour 3 oz of cold brew concentrate into each of 5 small mason jars and keep them in the fridge.
- Each morning, I grab a jar, pour it over ice, add syrup and milk, and I have a perfect latte in 30 seconds flat.
This is essentially the same approach I use when I make coffee smoothies — the batch prep is what makes daily coffee drinks sustainable instead of a chore.
Common Mistakes to Avoid
I made every one of these mistakes when I first started, so you do not have to:
- Using regular-strength coffee. If you brew coffee at normal strength and pour it over ice, the ice melts and you get watery, weak latte. Always brew double-strength or use espresso.
- Adding syrup to cold liquid. Vanilla syrup (especially homemade) mixes much better into hot or warm espresso. Adding it to cold milk means it clumps or sinks.
- Using small ice cubes from the freezer door dispenser. Those tiny cubes melt in 60 seconds. Use large cubes from a tray or buy a silicone large-cube mold for about $8. Your drink will stay cold and undiluted for 15-20 minutes longer.
- Skipping the milk froth. If you have a milk frother (even a $12 handheld one), frothing the milk before adding it changes the texture completely. It goes from coffee with milk to this tastes like it came from a coffee shop.
Frequently Asked Questions
Can I make an iced vanilla latte without espresso?
Absolutely. Use any strong coffee — a Moka pot, AeroPress, French press with fine grounds, or even a Keurig on the smallest cup setting. You need concentrated coffee (2-3 oz), not specifically espresso. The vanilla syrup and milk do most of the heavy lifting for flavor.
What is the best vanilla syrup brand?
For regular syrup, Torani and Monin are both excellent and widely available. For sugar-free, Jordans Skinny Syrups are the best-tasting I have found. But honestly, the homemade version above beats all of them — it tastes cleaner and more natural.
How many calories does Starbucks put in their iced vanilla latte?
A Starbucks grande iced vanilla latte with 2% milk has about 190 calories and 28g of sugar. My copycat recipe matches this closely. The healthy version cuts that roughly in half.
Can I make this hot instead of iced?
Yes — just skip the ice, steam or heat the milk, and combine. The proportions stay the same. But if you are making it hot, I would suggest checking out these Nespresso Vertuo recipes for even more latte variations.
Does the dairy-free version taste like coconut?
Slightly, but in a pleasant way. The coconut flavor is subtle — it reads more as creamy than coconut. The vanilla bean paste and maple syrup are the dominant flavors. If you really dislike coconut, oat milk is the next best dairy-free option.
How long does homemade vanilla syrup last?
In the fridge, 2-3 weeks. The sugar acts as a natural preservative. If it starts to look cloudy or smell off, toss it and make a new batch. A batch takes 5 minutes and costs less than a dollar, so I do not stress about making it fresh frequently.