I burned the sugar three times before I got the torch distance right. Three times! The first batch looked like a crime scene — blackened, smoking, smelling like a campfire. The second was barely caramelized, basically just warm sugar sitting on custard. But that third time? That first crack of the sugar top, shattering into the silky espresso custard underneath? Absolutely worth the burned fingers and wasted ramekins.
Here’s what you need: two cups of heavy cream, five egg yolks, half a cup of sugar, two shots of cooled espresso, and a teaspoon of vanilla. The espresso turns a classic custard into something deeply complex. And the water bath everyone dreads? It’s actually not that bad once you understand what it’s doing. I tested this with one, two, and three shots of espresso to find the sweet spot — and the differences were dramatic.
What You’ll Need
- 2 cups heavy cream
- 5 large egg yolks (save the whites for meringue or freeze them — don’t you dare throw them away)
- 1/2 cup granulated sugar, divided — 1/3 cup for the custard, remaining for the brûléed top
- 2 shots espresso (about 2 oz), cooled to room temperature (from an espresso machine or Moka pot)
- 1 teaspoon pure vanilla extract
- 4-6 shallow ramekins (6 oz wide, flat-bottomed — wide means more brûléed surface area, and that’s the whole point)
- A deep baking dish or roasting pan big enough for all your ramekins
- A kettle of boiling water
- A kitchen torch (or your oven’s broiler in a pinch, but the torch gives way better control)
- A fine-mesh strainer
The Espresso Ratio Test: 1 vs 2 vs 3 Shots
Before we get into it — the testing that shaped this recipe. Three identical batches of crème brûlée. Only difference: espresso amount. The results surprised me.
One Shot of Espresso
Barely there. Like, you get this vague warmth and depth that makes you think “huh, something interesting is happening” but you wouldn’t call it coffee. More like vanilla custard with a mysterious undertone. If you’re serving people who claim they don’t like coffee? Actually not a bad call — adds complexity without announcing itself. But for me it was frustrating. I wanted a crème brûlée that tasted decisively like espresso, and one shot was just… whispering.
Two Shots of Espresso
Nailed it. Unmistakable coffee flavor that still plays nice with the cream and yolks. The espresso cuts through the richness just enough to keep it from feeling heavy. Every bite is coffee and cream in perfect balance — bitterness, sweetness, richness, all holding hands. This is the batch that made my dinner guests stop mid-conversation, put their spoons down, and go “wait, what is IN this?” That reaction. That’s what you want.
Three Shots of Espresso
Too far. It tasted like sweetened espresso instead of a custard flavored with espresso — important distinction. The bitterness took over, the caramelized sugar top felt like it was fighting the coffee instead of complementing it, and the whole thing was just… intense. Not in a fun way. Three shots also added enough liquid to thin the custard slightly, giving it a softer set than the other two. If you’re the kind of person who takes your Americano black and thinks straight espresso is a light snack? Sure, go for three. Everyone else: two shots.
Step-by-Step Espresso Crème Brûlée
Step 1: Preheat and Prep (5 minutes)
Oven to 325°F. Not 350, not 375. The lower temp is everything — crème brûlée baked too hot sets too quickly on the outside while the center stays liquid, giving you this ring of tough custard around a runny middle. Nobody wants that. 325°F lets the whole thing cook evenly. Get your ramekins into the baking dish and put the kettle on. You’ll need boiling water in about 15 minutes.
Step 2: Heat the Cream (5 minutes)
Pour 2 cups of heavy cream into a saucepan over medium heat. Heat until it’s steaming with small bubbles forming around the edges — that’s scalding, and it takes about 4-5 minutes. Don’t let it boil. If it starts bubbling aggressively, yank it off the heat. You’re aiming for around 170°F — hot enough to temper the yolks without turning them into scrambled eggs. While the cream heats, move on.
Step 3: Whisk the Yolks and Sugar (3 minutes)
Grab a large bowl. Whisk 5 egg yolks with 1/3 cup sugar until the mixture goes pale yellow and thickens up a bit — about 2 minutes of steady whisking. You’re not trying to make a meringue or anything, just get it smooth and combined. The sugar partially dissolves and helps protect the yolks from scrambling when the hot cream arrives. Pastry people call this “blanching.” Sounds fancy. It’s just whisking.
Step 4: Temper the Egg Yolks (3 minutes)
This is the step that freaks everyone out. Don’t let it. You’re just slowly warming up the yolks so they don’t scramble on contact with hot cream. That’s it.
Ladle about 1/4 cup of the hot cream into the yolk mixture while whisking constantly. Yolks warm up. Add another 1/4 cup, still whisking. Now pour in the rest in a slow steady stream while you keep whisking. See tiny white flecks of cooked egg? Don’t panic. That’s what the strainer is for. The key: constant whisking, slow addition. You’ve got this.
Step 5: Add Espresso and Vanilla, Then Strain (2 minutes)
Stir in your 2 shots of cooled espresso and 1 teaspoon of vanilla. Gently though — vigorous whisking creates air bubbles that show up as tiny craters in the finished custard. Then pour everything through a fine-mesh strainer into a clean bowl or measuring cup with a spout. Catches any rogue egg bits. Gives you perfectly smooth custard. I strain mine twice because I’m a little obsessive about texture, but once is honestly fine.
Step 6: Pour into Ramekins (2 minutes)
Divide the custard evenly among your ramekins, filling about three-quarters full. Leave room for the sugar crust on top. Got small bubbles on the surface? Pop them with a toothpick or gently blow on them. They seem tiny and innocent now but they bake into little craters that mess up your caramelized top. Not the end of the world, but why not fix it when it takes two seconds?
Step 7: The Water Bath (the part everyone dreads)
Okay, the water bath. Fancy name: bain-marie. What it actually is: a pan of hot water that keeps your custard from cooking too fast. Without it, the bottom and sides overcook and you get grainy, curdled sadness. With it, everything cooks gently and evenly.
Here’s the move that changed everything for me: put the baking dish with the filled ramekins on the pulled-out oven rack FIRST. Then pour the boiling water from your kettle into the baking dish, around the ramekins, until it comes halfway up their sides. Go slow. Splash water into the custard and you’ll be very annoyed with yourself. Now gently push the rack in and close the door. No carrying a heavy dish of scalding water across the kitchen. Game changer.
Step 8: Bake and Test (40-45 minutes)
325°F, 40-45 minutes. Start peeking at 35. Here’s the jiggle test: tap the side of the ramekin. The edges should be set — solid, no movement. But the center should still have this gentle tremor, about the size of a quarter. That wobble is your friend. The center keeps cooking from residual heat as it cools, so pulling it while it still wobbles means you’ll end up with perfectly creamy custard.
Wait until the entire surface is solid with zero wobble? Overbaked. Texture will be closer to flan. Still edible, still tasty, but not that silky crème brûlée dream.
Carefully pull the ramekins out of the water bath — tongs are your friend here — and set them on a wire rack for 30 minutes. Then plastic wrap and into the fridge for at least 4 hours. Overnight is better. The custard needs this time to set fully and for the espresso to really meld with everything else. Rush it and you get soft, not-quite-set custard that can’t support the sugar crust.
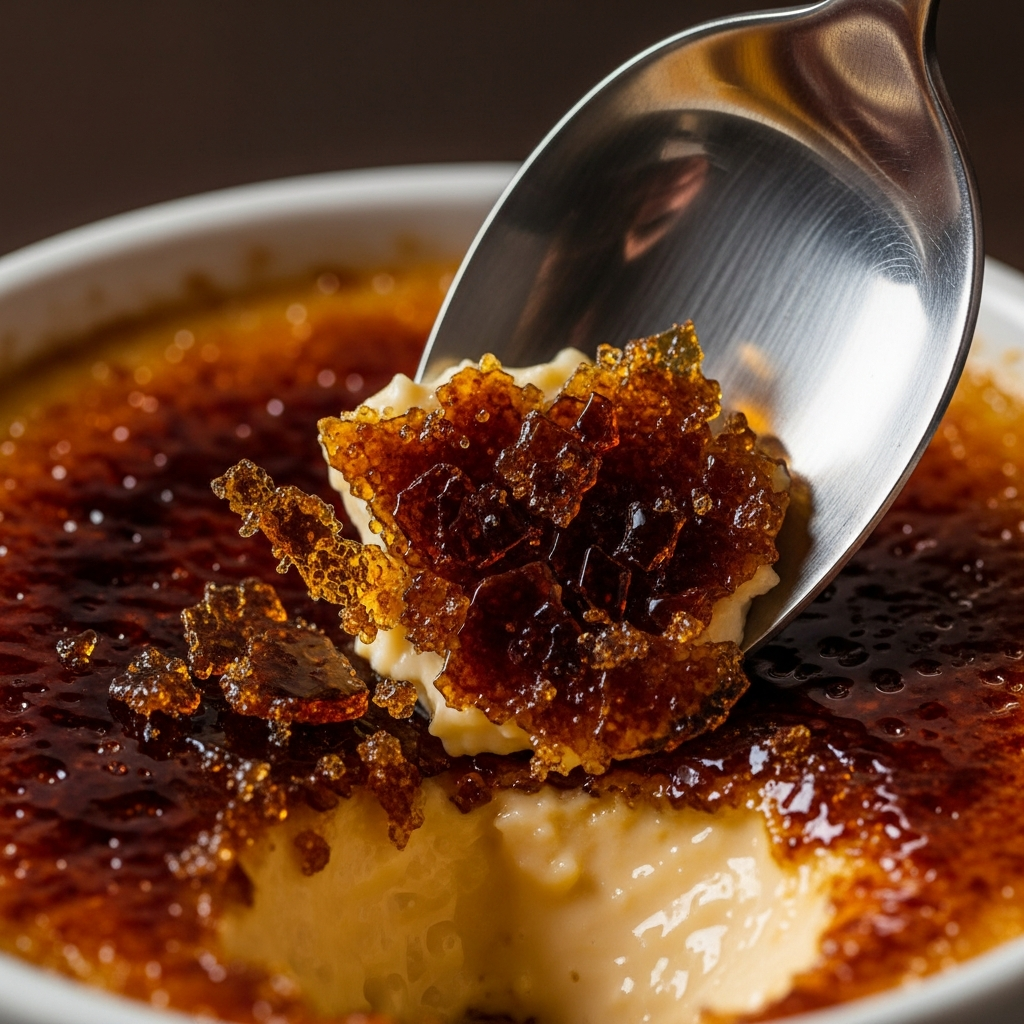
The Sugar Top: How to Get a Perfect Shatter
This moment. THIS is the moment. The crack of a spoon through glass-like sugar into silky espresso custard. One of the most satisfying things in all of dessert-making. Maybe in all of cooking. Fight me.
Sprinkle 1 tablespoon of granulated sugar evenly over each chilled custard. Tilt and rotate the ramekin to spread it into a thin, uniform layer. Tap out any excess. You want just enough to cover the surface — too thick and the bottom won’t caramelize before the top burns, too thin and you don’t get that satisfying crack.
Hold your torch about 2 inches from the surface. Slow, continuous circles. The sugar melts into liquid first, then turns golden, then amber. Stop at amber — it keeps darkening for a few seconds after you pull the heat away. (This is how I burned my first three attempts. I kept going until it LOOKED done, which meant it was already overdone.) Let each ramekin sit 1-2 minutes for the sugar to harden into a glassy crust. Tap it with a spoon. Listen. Smile.
No torch? Your oven’s broiler works in a pinch. Ramekins on a sheet pan, rack as close to the broiler as possible, 2-3 minutes while you stare at it without blinking. Rotate the pan once. Broiler method works but gives less control — some spots darker than others. A kitchen torch is like $15-20 and lasts for years. Worth it if you plan to make this more than once. Also useful for other coffee dessert presentations.
Make-Ahead Schedule for Dinner Parties
This is the ultimate dinner party dessert because the hard work happens way before anyone shows up. Here’s how I time it:
Up to 3 days before: Make the custard, pour, bake, cool, fridge. Done and done. The custard holds beautifully, and fun fact — the espresso flavor actually deepens over time as it melds with the cream. Day-two crème brûlée might be even better than day-one.
30 minutes before serving: Pull ramekins from the fridge. Let them sit 15 minutes at room temperature. Takes the extreme chill off and gives you way better flavor — cold mutes the espresso. Pat the surface dry with a paper towel if there’s condensation.
5 minutes before serving: Sugar. Torch. Serve immediately. The sugar crust starts softening and dissolving after about 20-30 minutes at room temperature. You want maximum shatter, so timing matters here.
Espresso Selection Tips
The espresso matters more than I expected. Medium-dark roast gives the most balanced flavor — enough bitterness to cut through cream without bulldozing everything. Light roasts add this fruity, acidic note that tastes kind of weird in custard. Very dark roasts bring a smoky, almost charred edge that fights with the caramelized sugar top. Neither great.
No espresso machine? A Moka pot works beautifully — it makes a concentrated, strong coffee that’s close enough to espresso for this. You can also dissolve 2 tablespoons of instant espresso powder in 2 tablespoons of hot water. Works just fine. What I’d avoid is regular drip coffee — too diluted, adds too much water, and messes with both the set and the intensity.
Troubleshooting Guide
Custard is grainy or curdled: Overbaked, oven too hot, or water bath wasn’t deep enough. Pull the custard when the center still wobbles next time, and check your oven with a thermometer. Lots of ovens run 15-25 degrees hot. Mine sure does.
Sugar won’t caramelize evenly: Uneven sugar layer. Tilt and rotate the ramekin more thoroughly. Also make sure the custard surface is dry before sugaring — moisture blocks caramelization.
Custard has tiny holes or bubbles: Whisked too hard when combining cream and yolks, or didn’t pop surface bubbles before baking. Strain the mixture twice and take a toothpick to any visible bubbles on the surface before it goes in the oven.
The sugar crust softened before serving: Torched too early. The moisture from the custard underneath slowly dissolves the sugar, which is why you should always sugar and torch within 10 minutes of serving. Timing is everything with the crust.
Frequently Asked Questions
Can I use whole eggs instead of just yolks?
Technically yes, but it won’t be the same dessert. Whole eggs set firmer — you end up with something closer to flan than crème brûlée. The whites add structure but kill that luxurious silkiness. If you go this route, try 3 whole eggs instead of 5 yolks. Lighter, less rich, still good in its own way. But the yolks are what give crème brûlée its signature decadence. I’d really stick with yolks for the real deal.
What sugar works best for the brûlée top?
Regular white granulated sugar. That’s it. Some recipes get fancy with superfine sugar (thinner, more even crust but less dramatic crack) or turbinado/raw sugar (thicker, crunchier, deeper caramel flavor but uneven melting). I’ve tried all three. Regular granulated wins for consistency and satisfaction. That shatter sound? Regular sugar.
Do I really need a kitchen torch?
For the best results? Yeah. The torch gives you precise control and a more even crust. A basic culinary torch runs about $15-20 and lasts years. That said, the broiler method works if you don’t have one — just watch it like a hawk because it goes from golden to charcoal in about 15 seconds. Position ramekins 2-3 inches from the heating element, rotate the pan once.
Why did my custard crack on top?
Overbaked. The proteins in the egg yolks contract as they set, and if they set too hard, the surface cracks — same reason cheesecakes crack. Pull it earlier next time (center still wobbling) and make sure the water bath is deep enough. Low water level means the exposed part bakes faster and cracks. Been there, done that, got the cracked custard to prove it.