
Assembling a coffee snack board is an excellent way to offer guests a mix of sweet and savory options. This guide provides a flexible framework for building your board with familiar components and package-specific handling directions. FoodSafety.gov’s time and temperature rules apply to the components that are perishable.
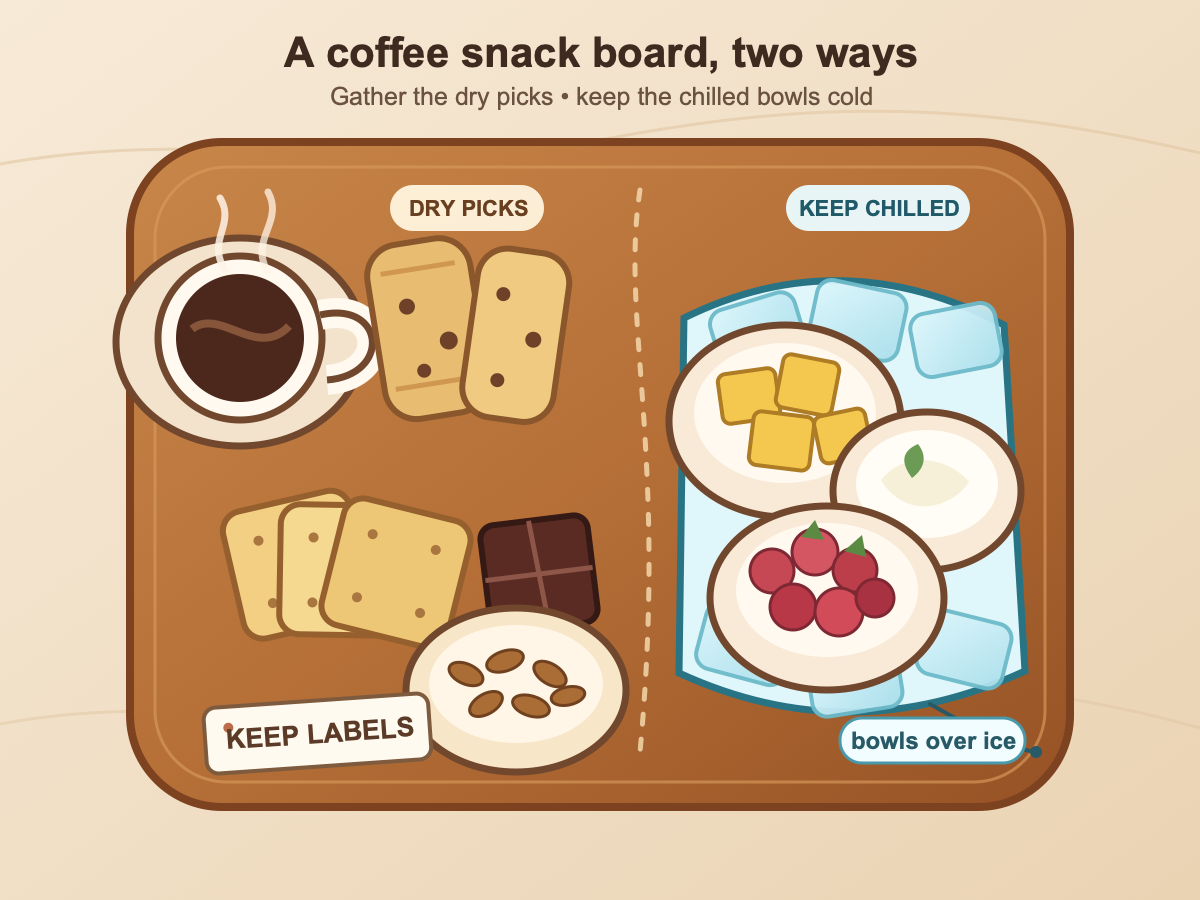
Understanding the Two-Zone Setup
A successful snack board relies on separating components based on their handling requirements rather than assuming all dry items are safe indefinitely or that all fresh items spoil immediately. Check each package to determine whether a component requires refrigeration.
Dry Components
Use these dry choices as flexible examples, then follow the storage directions on each package:
- Biscotti or plain cookies
- Pretzels and crackers
- Chocolate pieces
- Nuts
Note on Allergens: Nuts and other ingredients may present allergen risks. Retain the original packaging or a written ingredient list to inform guests of potential allergens. Physical separation alone does not prevent cross-contact; use guest-specific information and package labels for decisions about what to serve.
Chilled and Perishable Components
Cheese, yogurt-based dips, cut fruit, and berries are flexible examples rather than ingredient-specific safety classifications. Follow the storage directions on each package. Apply the time and temperature rule below to the components that are perishable.
Assembly Order and Hygiene
Start with clean equipment and an organized setup:
- Clean Surfaces: Wash hands with soap and water for 20 seconds before, during, and after preparation. Start with clean surfaces, utensils, plates, and cutting boards.
- Prepare Containers First: Set out bowls or shallow trays for chilled items before arranging dry goods.
- Arrange Dry Items: Place the dry components on the board first.
- Add Chilled Items Last: Nestle perishable foods in bowls of ice or serve them in small trays that can be replaced often.
Serving Time and Temperature Rules
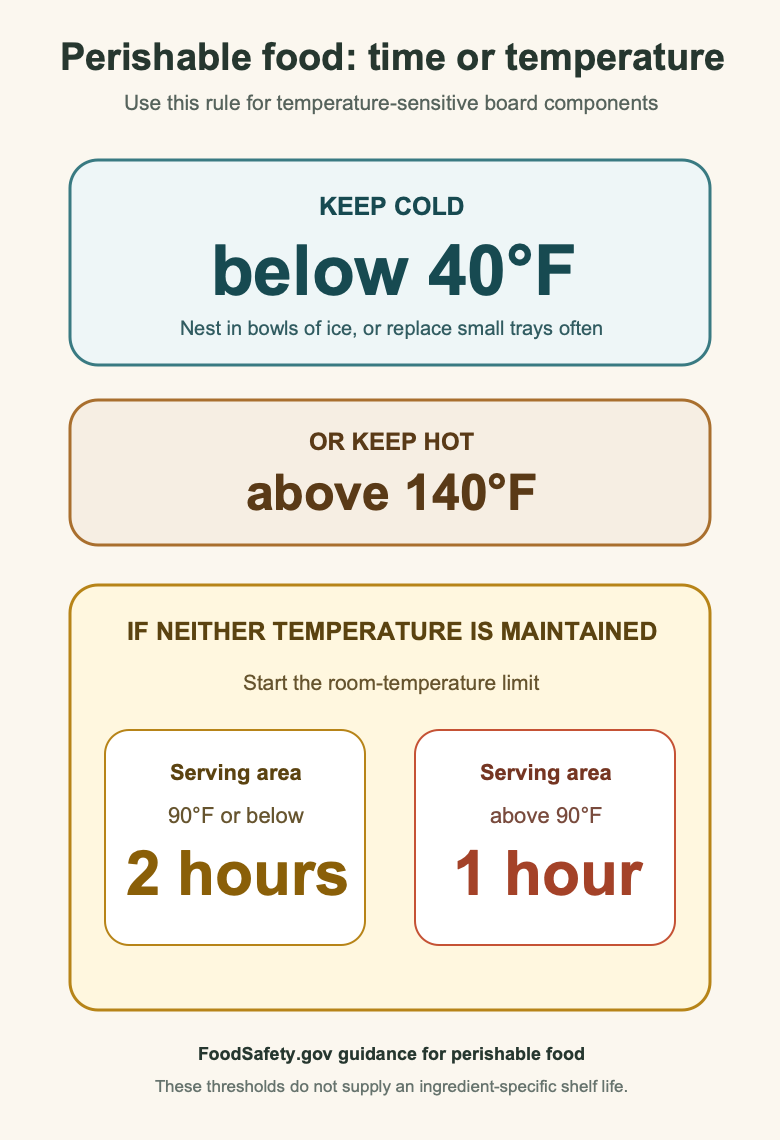
FoodSafety.gov gives these limits for perishable food:
- Standard Rule: Perishable food should not sit at room temperature for more than 2 hours.
- Hot Weather Rule: If the serving area is above 90°F (32°C), reduce this limit to 1 hour.
- Safe Holding: These room-temperature limits do not apply while perishable food is kept below 40°F (4°C) or above 140°F (60°C).
If you are serving a large group, replenish small portions of chilled items frequently rather than leaving one large bowl out for an extended period. Note when each perishable component leaves safe hot or cold holding so the applicable limit is not exceeded.
Managing Leftovers
FoodSafety.gov says food kept above 140°F or below 40°F can be placed in shallow containers and refrigerated. Eat or freeze those qualifying leftovers within four days. This does not establish an ingredient-specific shelf life, so continue to follow package directions.
Building Your Board
Use this simple framework to accommodate guest preferences:
- Choose Familiar Foods: Select items you know and trust, checking package labels for specific handling directions.
- Label Ingredients: Keep original packaging or a clear list of ingredients available for guests with dietary restrictions or allergies.
- Offer Coffee Options: Provide hot and decaf coffee options. Cold coffee is optional and can be served alongside the board.
- Plan Chilled Refills: Keep replacement trays refrigerated until needed, or keep perishable components below 40°F in bowls of ice.
This approach lets guests choose familiar snacks while the host keeps package directions and the perishable-food timer easy to follow. The two-zone layout is an organizational tool, not a guarantee against cross-contact or temperature problems.
Further Reading
For additional ideas, visit our guide to snacks that go with coffee. The separate 15 easy coffee snacks collection focuses on individual recipes rather than board assembly. For make-ahead options, consider our recipe for chocolate coffee protein balls. For specific cookie ideas, see our cookie dunking guide.
Resources
See the complete FoodSafety.gov serving guidance.